I found two hard cases for the cyberdeck, both of which were very cheap. The picture in the previous post was the larger of the two (355×265×90 mm), and it is able to comfortably fit most 60% keyboards. The smaller one (265×210×80 mm) I think should be much more suitable. It will fit the screen and motherboard and the USB hub just fine but no suitable keyboards can fit in such a small space. I would need a 40% keyboard. They are rare, and consequently very expensive, and I am not spending approximately $150 for an off the shelf keyboard whose key arrangement might be as dodgy as the current one. I’d rather build my own, even if it will wind up costing more, at least the whole thing is to my spec and I can customise it as much as I need.
It turns out that there are a lot of resources for building such a keyboard. There is a website for editing keyboard layouts, and once you’ve decided on a layout. This was the 40% layout I settled on:

There’s another site where you can use the JSON format of your layout to make a corresponding keyboard plate. Once I had those, I found a somewhat out of date book on how to use KiCad to make a keyboard PCB. This process was not so hard for someone with my sort of electronics background. One of the things I wish I knew that the book really should have explained was that you should try to import the SVG of the keyboard plate you created with the above site into KiCad as user drawings and the boundaries as edge cuts, so that you can align the key footprints and make sure that the PCB’s edge cuts are precisely aligned with the plate design. This would have saved me a lot of time and effort in attempting to make sure my keyboard PCB would be correctly aligned to the plate.
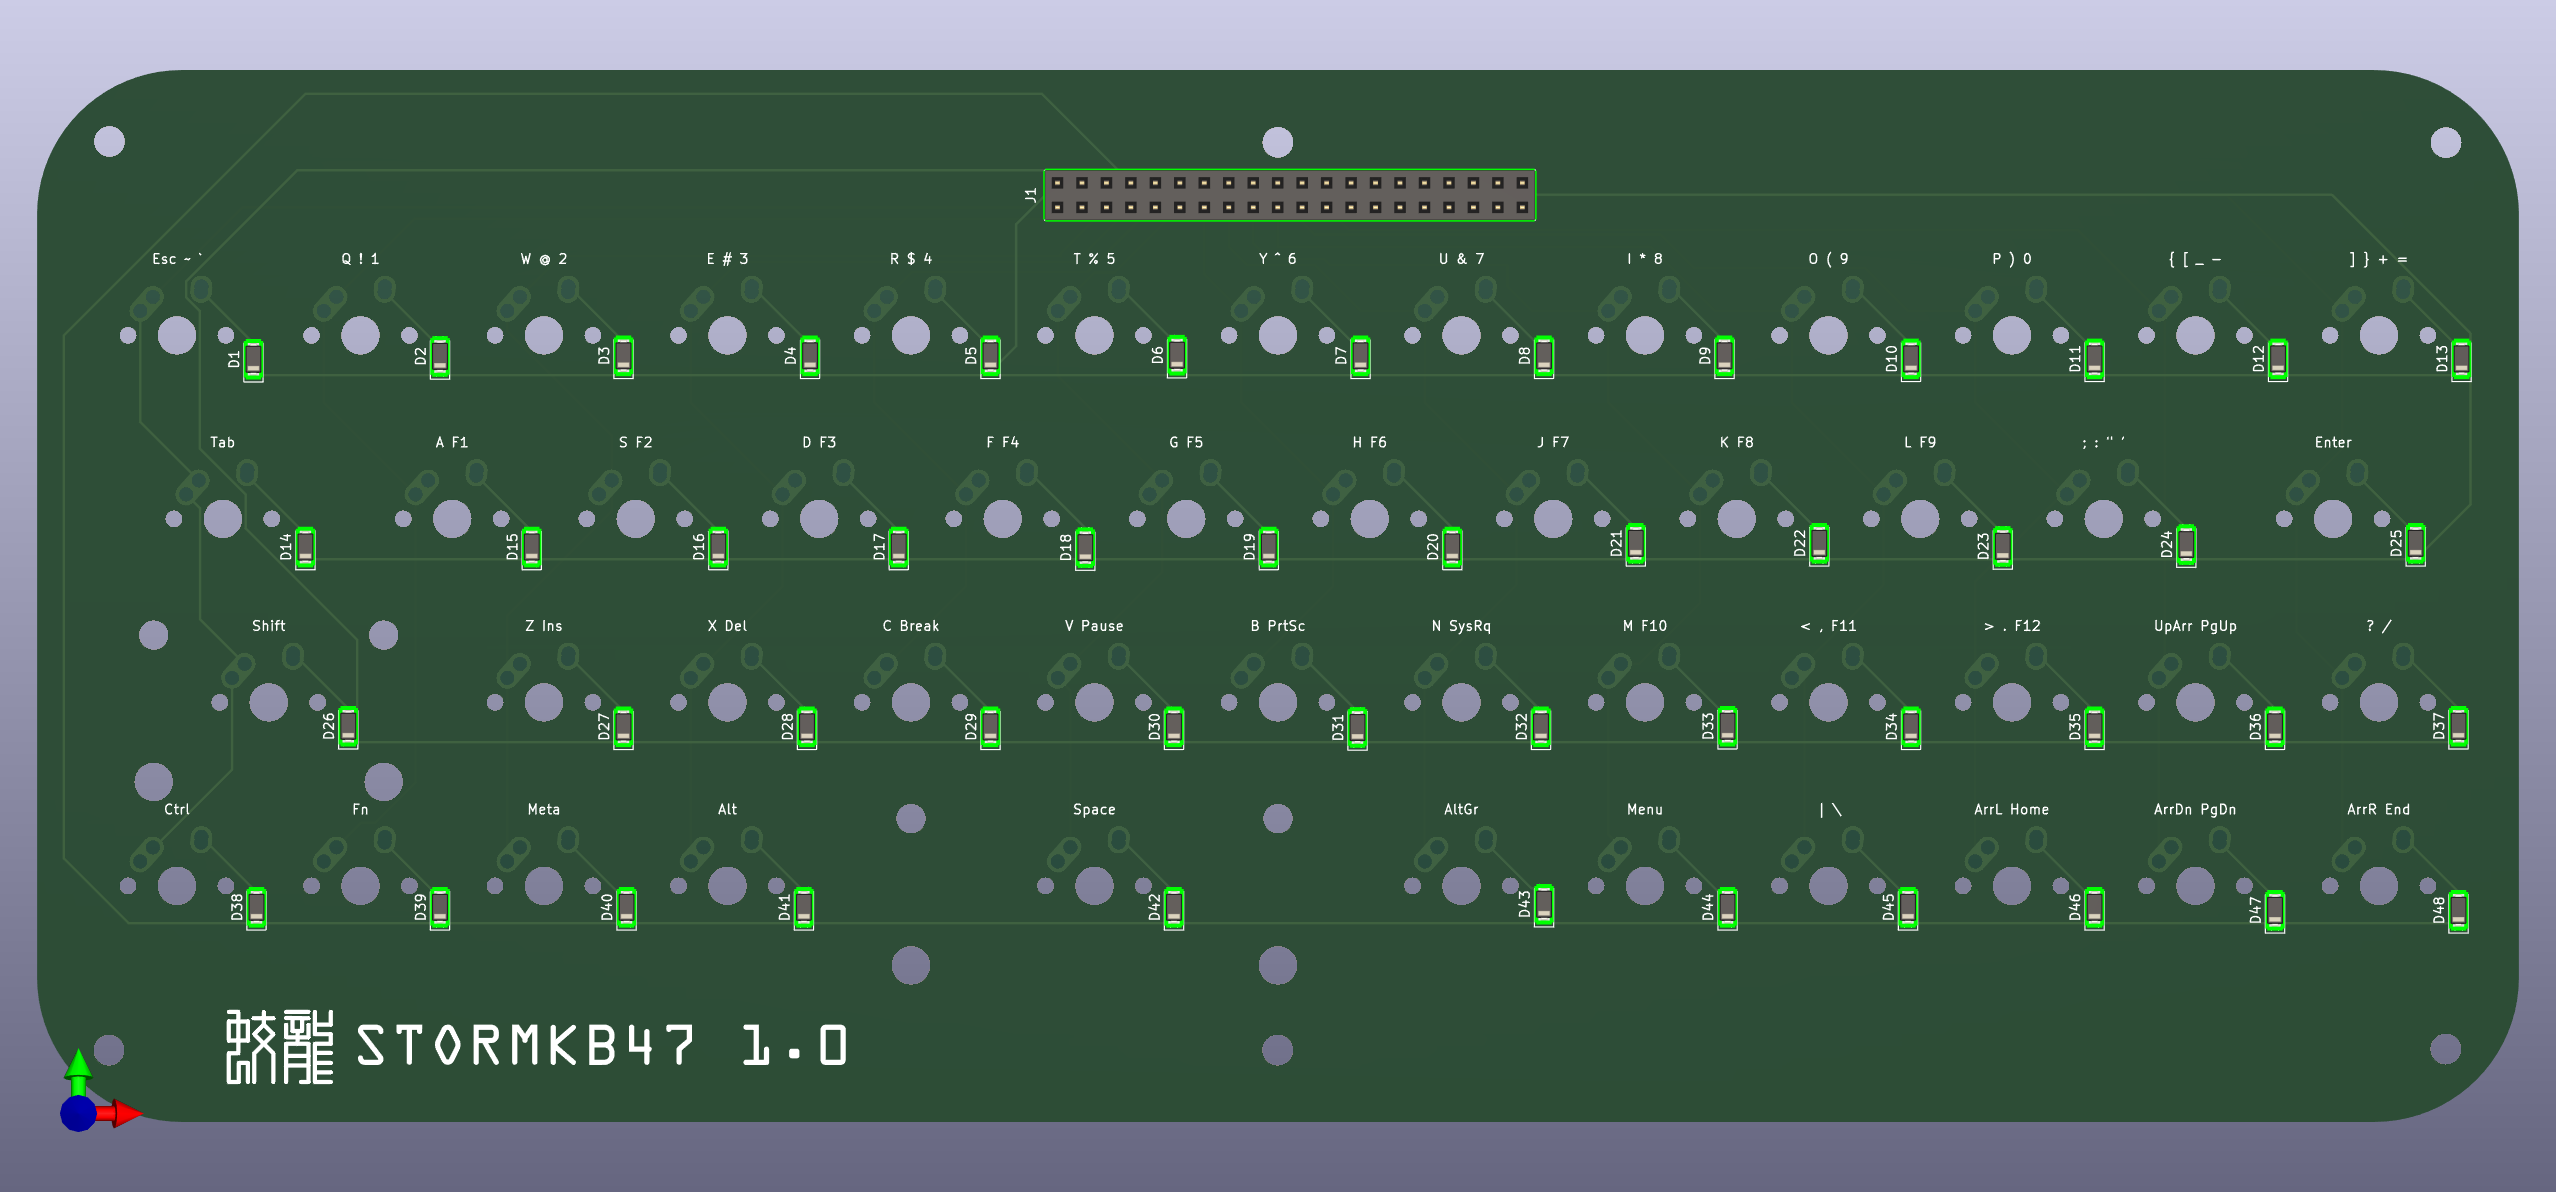
Instead of putting the keyboard microcontroller on the keyboard PCB itself, I’d opted to put it on a separate board that plugs into it with a 40-pin header, so I can use any controller with any suitable interface. I will start with using an Arduino Micro, which a lot of custom keyboard setups use because it’s an Atmega32u4 that makes it very easy to do USB HID. Later on I may use a Nice!Nano as the controller so I can make it Bluetooth, or maybe even one of the really cheap MH-Tiny ATTiny88 boards that I can probably program to return keyboard events using HID-over-I²C. There is an I²C bus on the Pine A64-LTS that I can use for that I think.
I sent the board and plate design to Elecrow for fabrication the other day. It seems that in addition to making PCBs they can also make laser-cut acrylic. Total cost is about US$60 for five boards and five plates, including shipping from their factory in Shenzhen. I have an Arduino Micro hanging around somewhere, and the SOD123 1N4148 diodes are like US$1 for 50. Knockoff Cherry MX-compatible keycaps are like $10 for 100. 150 hotplug sockets are like $8. I may need a 40-pin IDC ribbon cable which might be better than just wire-wrapping the Arduino to the keyboard PCB. I should get all this stuff within the first week of the new year.

Leave a comment